- 首页
Home - PRODUCT
- Electronic Universal Testing Machine Series
- Electro Hydraulic Servo Universal Testing Machine Series
- Impact Testing Machine Series
- Impact Test Low-Temperature Chamber Series
- Torsion Testing Machine Series
- Compression Testing Machine Series
- Erichsen And Deep Drawing Cups Testing Machine Series
- Bending Testing Machine Series
- Specialized Testing Machine Series
- Metallographic Product Series
- Hardness Tester Series
- Attachment
- Electronic Universal Testing Machine Series
- ABOUT LIANGONG
- NEWS
- SOLUTIONS
- CONTACT US
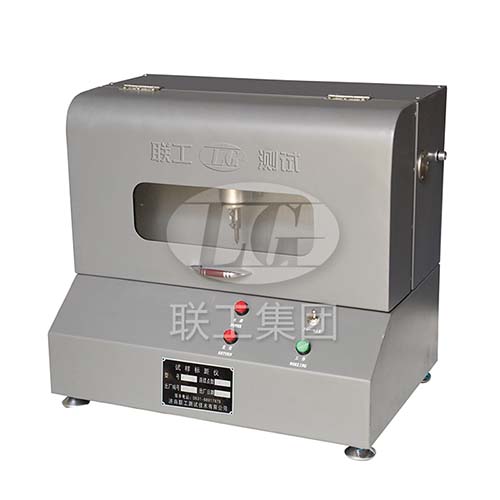
The principle and operation method of continuous dot marking gauge for electric tensile test specimens

The principle and operation method of continuous dot marking gauge for electric tensile test specimens
The continuous marking gauge for electric tensile test samples used in the joint inspection uses a micro motor as the power source, which drives the high-precision ball screw to rotate through a synchronous belt, thereby driving the horizontal movement of the punch. For every one (or half) rotation of the screw, the impact needle travels 10mm (or 5mm), and at the same time, the sensor collects a signal, which drives the high-frequency electromagnet to drive the impact needle to make dots. The motor can run continuously to mark 60 (5mm) or 30 (10mm) dots.
Operation method
1. Place the device on a workbench about 500mm above the ground, place the sample in the V-shaped groove of the device, and lock the fixture to fix the position of the sample.
2. Adjust the position of the impact needle tip and the surface of the sample according to the diameter of the sample, and use a randomly worn height block to maintain a suitable distance from the sample.
3. Select the 5mm/10mm gear according to actual needs.
4. Press the "Power" button to turn on the power, and then press the "Work" button without releasing it. The impact needle can continuously dot the surface of the sample, and releasing the button will stop the dots. Press the 'reset' button, and the marking device will move from right to left to the appropriate position. Release the button to stop. This machine is equipped with a safety protection device, which will automatically stop when the punch part moves to both ends.
5. Release the fixture, take out the sample, press the "reset" button without releasing it, and move the punch to the left to restore its original position, thus completing one gauge marking work. If you need to dot again, repeat the above steps.
上一篇 Previous:无 None
下一篇 Next:国标GB/T3808和GB/T229要求的金属铸件和锻件的力学性能检测
 :+86 13583113038
 :
:

